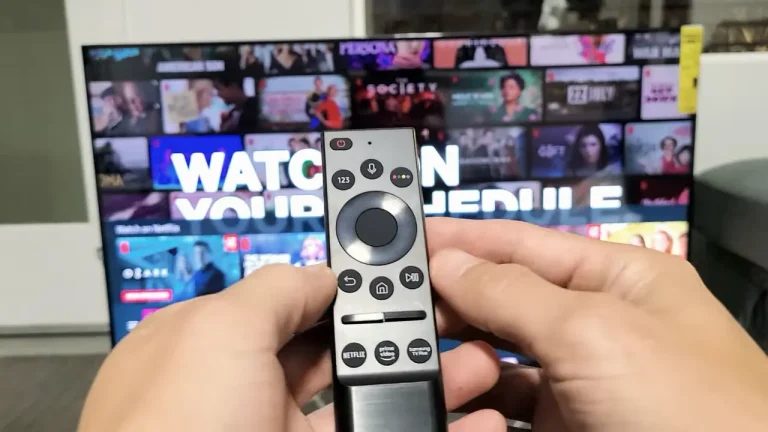

JVC Remote Not Working – 9 Fixes
Having trouble with your JVC remote can be incredibly frustrating, especially when you just want to relax and enjoy your favorite TV shows or movies. Whether your remote is unresponsive, partially functional, or not working at all, there are several potential solutions to get it back in working order.
In this guide, we’ll explore nine practical fixes that can help you troubleshoot and resolve common issues with your JVC remote. From checking the basics like batteries to more advanced troubleshooting, we’ve got you covered. Let’s get started!
Why is My JVC Remote Not Working?
If your JVC remote is not working, it could be due to a variety of issues ranging from battery problems to more complex hardware malfunctions. Here are nine fixes to help you troubleshoot and resolve the problem.
1. Check the Batteries
Inspect Battery Placement and Condition
Ensure the batteries are inserted correctly. The positive and negative terminals should align properly with the markings in the battery compartment.
Steps:
- Open the battery cover.
- Remove the batteries.
- Reinsert them, ensuring correct placement.
Replace with Fresh Batteries
Old or weak batteries are a common cause of remote malfunctions. Replace the existing batteries with new, high-quality ones.
Tip: Use alkaline batteries for longer life and consistent performance.
2. Clean the Battery Contacts
Remove Corrosion
Corroded battery contacts can prevent your remote from working.
Steps:
- Remove the batteries.
- Use a cotton swab dipped in vinegar or lemon juice to clean the contacts.
- Dry the contacts with a clean cloth.

3. Reset the Remote
Discharge Residual Power
Resetting the remote can sometimes resolve issues.
Steps:
- Remove the batteries.
- Press and hold every button on the remote for about 10 seconds.
- Reinsert the batteries.
4. Check the Infrared (IR) Sensor
Test the IR Signal
You can use a smartphone camera to check if your remote’s IR sensor is working.
Steps:
- Open your smartphone camera.
- Point the remote at the camera and press a button.
- If you see a flashing light on the camera screen, the IR sensor is working.
Clean the IR Sensor
Dust or dirt on the IR sensor can block the signal.
Steps:
- Gently wipe the sensor on the remote with a soft cloth.
- Clean the sensor on the TV or device as well.
5. Pair the Remote with Your Device
Re-pairing Process
Sometimes the remote can lose its pairing with the device. Follow the re-pairing process as per your device manual.
Example: For a JVC TV, press and hold the “Home” and “Back” buttons together for 3 seconds.
6. Update Your Device Firmware
Check for Firmware Updates
Outdated firmware on your JVC device might cause remote control issues.
Steps:
- Go to your device settings.
- Navigate to “System” or “Software Update.”
- Follow the on-screen instructions to update the firmware.
7. Replace the Remote
Consider a Universal Remote
If your remote is beyond repair, a universal remote can be a good alternative.
Benefits:
- Compatible with multiple devices.
- Easily programmable.
External Link: Learn more about universal remotes and their compatibility here.
8. Inspect for Physical Damage

Check for Cracks or Broken Buttons
Physical damage can impair remote functionality. Inspect for visible cracks, broken buttons, or any signs of internal damage.
Fixes:
- Replace the remote if damage is severe.
- Attempt minor repairs if you’re comfortable with electronics.
9. Contact JVC Support
Seek Professional Assistance
If none of the above fixes work, it might be time to contact JVC customer support.
Steps:
- Visit the JVC support website.
- Find contact information or live chat options.
- Provide them with details of your issue for further assistance.
External Link: Access JVC customer support here.
By following these steps, you can effectively troubleshoot and potentially fix your JVC remote issues. Remember, regular maintenance and care can prevent many common problems, ensuring your remote remains in good working condition.
FAQs
1. Why is my JVC remote not working even after changing the batteries?
There are a few reasons why your JVC remote might not work even after changing the batteries:
- Incorrect battery placement: Ensure the batteries are inserted correctly, with the positive and negative terminals aligned properly.
- Battery corrosion: Check for any signs of corrosion in the battery compartment and clean it if necessary.
- Remote reset: Sometimes, the remote might need a reset. Try removing the batteries and pressing all the buttons for about 10 seconds to discharge any residual power, then reinsert the batteries.
2. How can I tell if my JVC remote sensor is working?
To check if the infrared (IR) sensor on your JVC remote is working:
- Use a smartphone camera: Turn on the camera on your smartphone and point the remote towards the camera lens. Press any button on the remote and look at the screen. If you see a flashing light coming from the remote, the IR sensor is working.
- Test with another device: If possible, use your JVC remote with another compatible JVC device to see if it responds. If it does, the issue might be with the original device rather than the remote.
3. Can I use a universal remote if my JVC remote is not working?
Yes, you can use a universal remote as an alternative if your JVC remote is not working:
- Compatibility: Ensure the universal remote is compatible with JVC devices. Most universal remotes list compatible brands and models on their packaging or in the user manual.
- Programming: Follow the instructions provided with the universal remote to program it to work with your JVC device. This usually involves entering a specific code for JVC or using an auto-search function to find the correct code.
- Features: Keep in mind that while most universal remotes will control basic functions, some advanced features specific to JVC remotes might not be available.